Vinegar Eels | A Reliable First Food
When it comes to feeding tiny fry, few live foods are as dependable and fuss free as vinegar eels. These microscopic nematodes are smaller than microworms, making them ideal for species with tiny mouths. But what really sets them apart is their behaviour, they stay suspended in the water column, giving fry plenty of time to feed throughout the day.
Whether you're raising tetras, gouramis, or other small community fish, vinegar eels offer a gentle, nutritious start. And the best part? They're incredibly hardy and easy to culture, even for beginners.
How to Culture Vinegar Eels
You don’t need fancy equipment or constant attention, just a few items and some time.
What You’ll Need:
- 500ml to 1L jar or bottle with a loose-fitting lid (a paper towel secured with a rubber band works well)
- 1 small apple, sliced thin
- Apple cider vinegar
- Treated tap water (dechlorinated)
- Vinegar eel starter culture
Instructions:
- Prepare the base: Mix equal parts apple cider vinegar and treated water. Fill your jar, leaving some air space.
- Add the apple: Wash and slice the apple, then drop a piece into the jar.
- Introduce the culture: Add your vinegar eel starter.
- Ventilate: Loosely seal the jar or poke a small hole in the lid to allow gas exchange.
- Store: Keep at room temperature. A dark cupboard is helpful but not essential.
Optional tip: Some aquarists add a pinch of sugar or yeast to boost the culture early on, but the apple alone usually provides enough nutrition
Maintenance & Longevity
Vinegar eel cultures are famously low maintenance and most will thrive for 6 -12 months without feeding or water changes. If the liquid turns cloudy or smells off, it’s time to refresh:
- To refresh: Pour a quarter to a half the culture into a clean jar and top both with fresh 1:1 vinegar-water mix.
- If you only want one jar: Share or discard half before topping up the original.
When Will My Culture Be Ready?
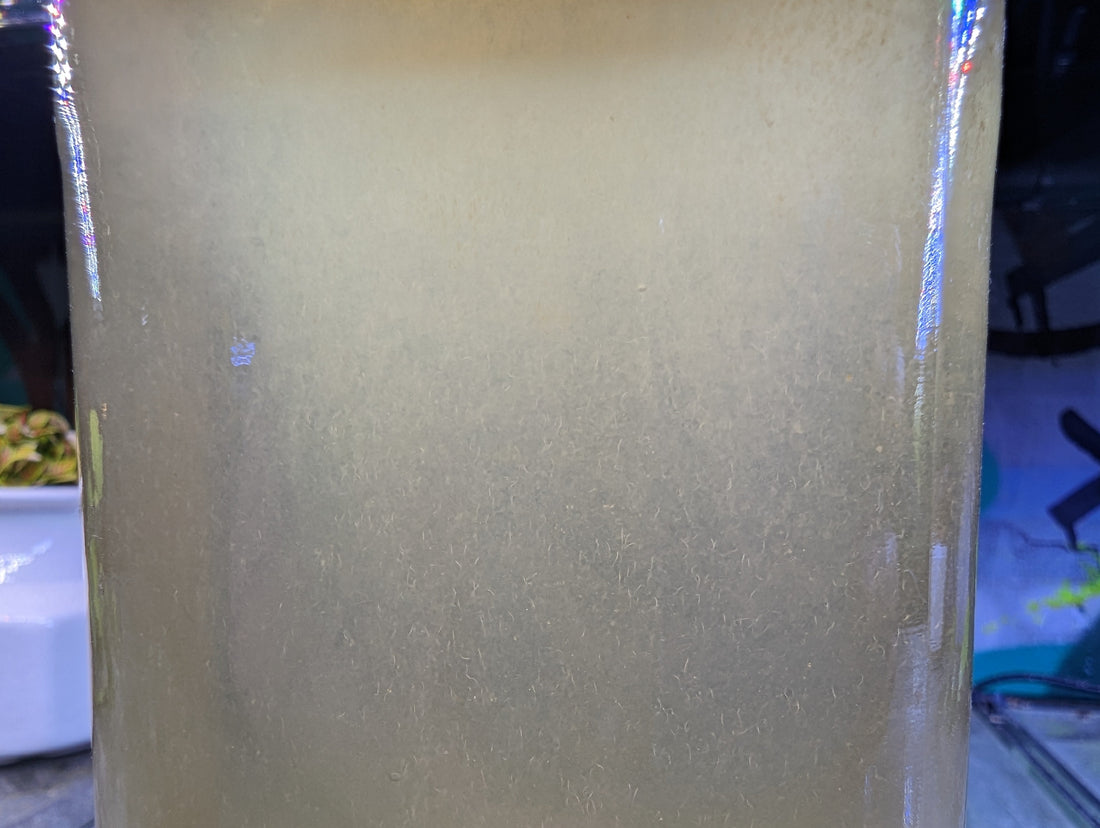
Expect to see activity within 2 - 4 weeks. Look for tiny, threadlike movements in the liquid, you can see them with the naked eye or a magnifying glass. A mature culture often looks slightly cloudy due to the density of eels.
How to Harvest Vinegar Eels
This method keeps vinegar out of your fry tank while delivering clean, active eels.
What You’ll Need:
- Mature vinegar eel culture (2-4 weeks old or more)
- Narrow neck bottle (wine, beer, or soda bottle)
- Cotton balls or filter floss
- Treated tap water
- Small jar or container
- Pipette or dropper (optional)
Harvest Method: Vinegar-Water Extraction
- Set up: Fill the bottom half of your bottle with the mature culture.
- Create a barrier: Plug the neck with cotton or floss to separate layers.
- Add clean water: Slowly pour treated water on top of the barrier.
- Wait: Let sit for 8-24 hours. Eels will migrate into the clean water layer.
- Harvest: Use a pipette or dropper to collect eels from the top layer. The vinegar stays behind!
Tips for Best Results
- Harvest the day before feeding to allow time for migration.
- Always use dechlorinated water, chlorine and chloramines will kill the eels and your fry.
- Replace the clean water layer after each harvest to keep things fresh.
Whether you're just starting out or refining your fry feeding routine, vinegar eels are a reliable, low effort option that can support healthy growth in those crucial early days.
